|
Welcome to Gary Olsen's Recumbent Bicycle Page The
I discovered this bike on the Internet. It's imported from Taiwan (manufactured by Mascot or Performer. I'm not actually sure), where most of the production recumbent bikes and trikes come from. ActionBENT Bicycle Company is no longer in business in the US but when I bought the bike, it was located in Redmond, Washington. The company was run by these two very dedicated and enthusiastic guys who possessed a great connection with Asian bicycle manufacturers. But alas, the party for them is over. For reasons behond my comprehension, Actionbent as a US importer of bikes and trikes is officially out of business. Nonetheless it seems there are more recumbent bikes out there in the marketplace than ever before. Perhaps the Web is just bringing these companies to everyone's attention. After all, the Web provides the opportunity for communities of enthusiasts to grow around new designs and technologies like this. In the recumbent marketplace there are bikes and trikes. There are two kinds of trikes, tadpoles and deltas. In bikes there are long wheelbase and short wheel base recumbents with handlebars beneath the rider's seat traditional handlebars. My recumbent bike is a compact wheelbase for a tighter turning radius and it has underseat steering. I'm already thinking about my next recument, and it will be a tadpole style trike. I'm getting older, and the added stability is something I'm looking for. That's why I'm selling my two wheeler recumbent. It has been a great ride because I learned so much about recumbents. Even though the designs of recumbent bikes span quite a variety, all have one thing in common... the rider is in a reclining position, head upright, and there is no skinny leather seat sticking up one's nether regions. Of all the bikes I studied, it was this one, the ActionBENT, that had the most unique design and, as it became apparent, was a superior design in terms of weight, speed and hill-climbing ability. It also was the best value. The ActionBENT was about half the price of similar bikes. I feel I got an extremely good deal. I first bid for an ActionBENT on eBay, and lost at the last minute. I contacted the company who was offering the bike and they offered to sell me one on the spot for the price I was willing to pay (about $800). In a few days a box was on my doorstep. That's how this adventure began. I had read the Blogs on the Web by recumbent owners, and at the time ActionBENT seemed to have the most dedicated and loyal following. On eBay, where most of the bikes are sold directly to consumers in a bid process, it is billed as the best value by many of the reviewers. The bike I purchased, The Tidal Wave, was priced in the neighborhood of $850 in 2004. I
was attracted to the idea of a
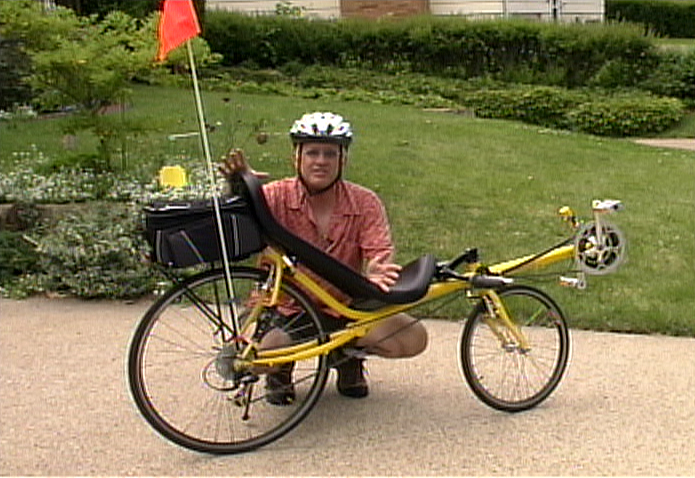
And I can't emphasize this aspect of the recumbent more... the seat. It is its finest asset (pun intended). Yes, the seat! It is the genius behind this bike's great design. Most seats you'll find on recumbents are like modified lawn chairs made of aluminum tubes and laced-on woven plastic web material. But the seat on the ActionBET is a carefully upholstered bannana-shaped seat that is indescribably comfortable. The only drawback is it's vinyl covered. I had the seat re-upholstered. I wanted leather, but I settled for a faux ostrich skin vinyl, very high quality. It is cooler because of the texture of the vinyl. Frankly, I can't stand those tight, thickly padded bicycle shorts one has to wear with traditional bikes because bike seats will chafe you something awful, especially on long rides. Such is not the case with this recumbent. The seat is wide and you have a back rest. I can wear my favorite cargo shorts or any light shorts. There are other advantages, but there are some slight disadvantages, too, that I'll discuss later.
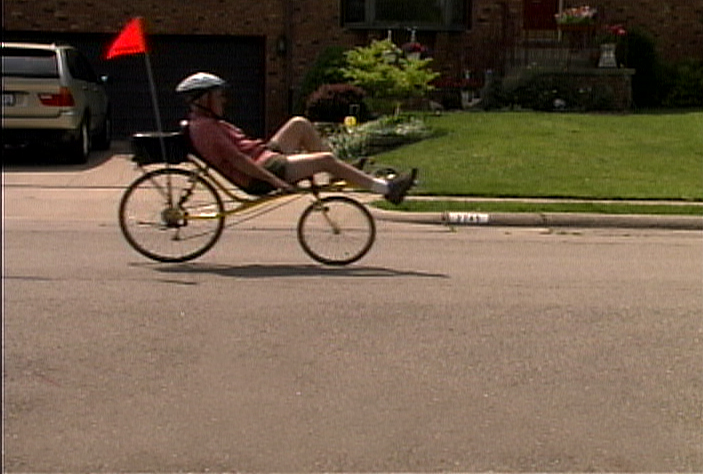
What I didn't realize until I actually purchased my recumbent was that when you are in the reclining position you cut the wind more efficiently. There is considerably less wind resistance. If you watch the movie clip of me riding, You'll see immediately what I'm talking about. With the bike's 27 gear combinations, I can fly at tremendous speeds. In fact, I can go much faster on this bike than any other I own, and frankly, it's a little scary. I must admit I break a lot going down hills. The bike can go quite fast. What about hill climbing ability? I discovered I can climb hills faster and with less effort. The reason (once again) is the seat design that allows me to use my back muscles braced against the seat back to really get cranking power without having to stand on the crankset (which you can't do on a recumbent anyway). I also found a little known fact that a land speed record for a bicycle was accomplished on a recumbent. Also, I had heard that recumbents are not allowed in the Tour de France because early models that appeared on the course in the early half of the 20th Century apparently "blew by" the more conventional bicycles, so they were somehow banned. I don't know if this is entirely true, but it's the kind of story recumbent nuts like to tell. What I love about the recumbent... I was warned that recumbents are not good on hills, and since I live in an area of the country that is all hills, I surmised that this was the reason I didn't see more recumbents. The other day I was riding around the neighborhood as I usually do about five or six times a week, and half my circuit around two blocks is up hill. I saw this gentleman about my age (I'm 63) on a mountain bike chugging up the hill, and I just blew right past him. I then put it into high gear at the top of the hill and whipped around the two block course almost lapping him! I love the comfortable ride of my recumbent. Sitting reclined with my head in a natural position not having to crane my neck to see forward is a wonderful advantage for which I bought the bike in the first place. I'm happy with the quality manufacturing. The welds are excellent. Yes, the bike is heavier than most, but I feel, because of its design, I can transfer more power to the pedals making it a more efficient bike for me. I can't help wonder what this bike would be like if it was a combination of steel and carbon fiber like one of those Trek LeMond's. The advantage of carbon fiber frames besides light weight is they are somewhat flexible and absorb shocks better.
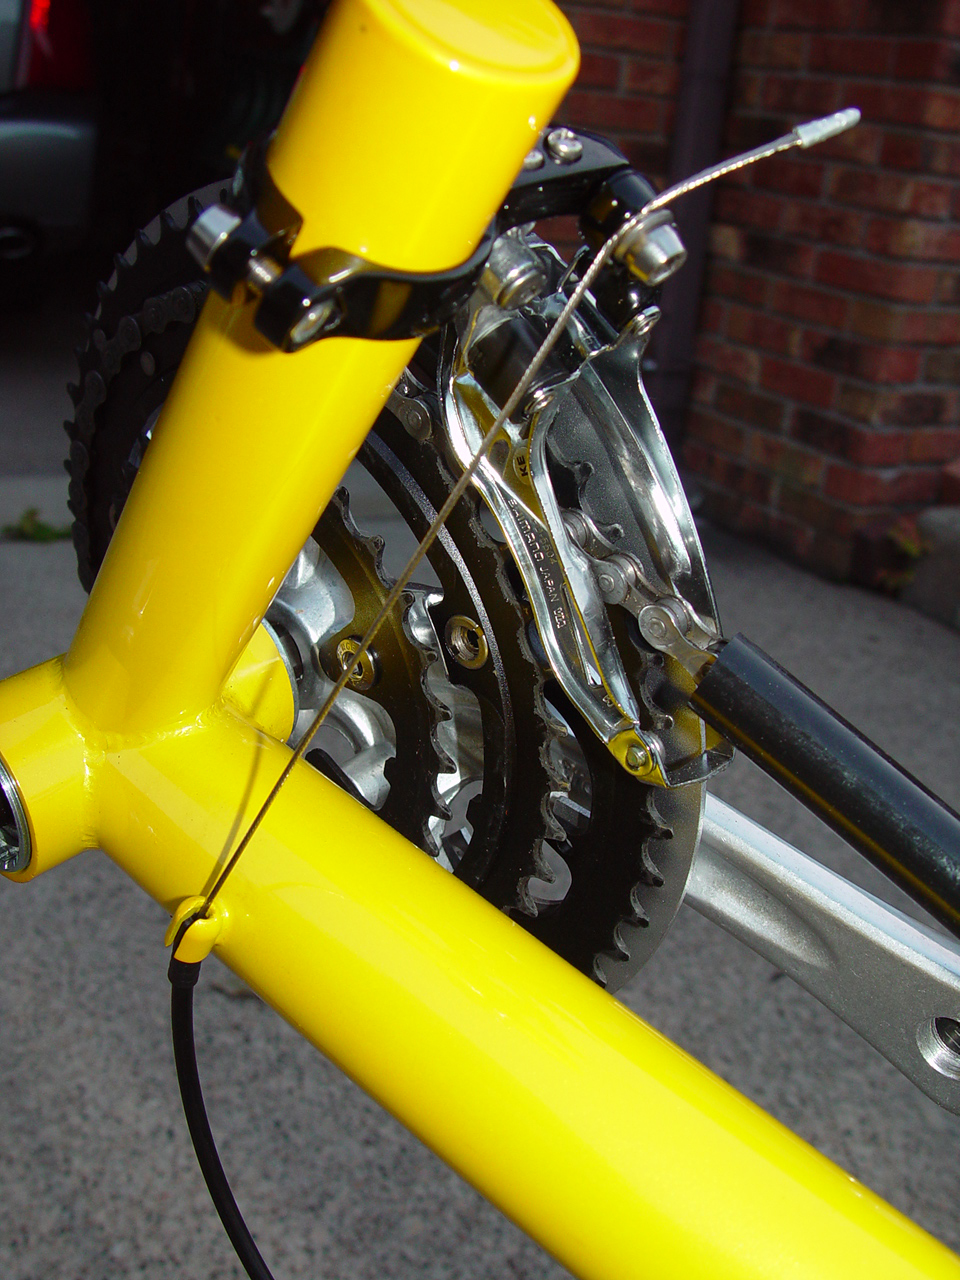
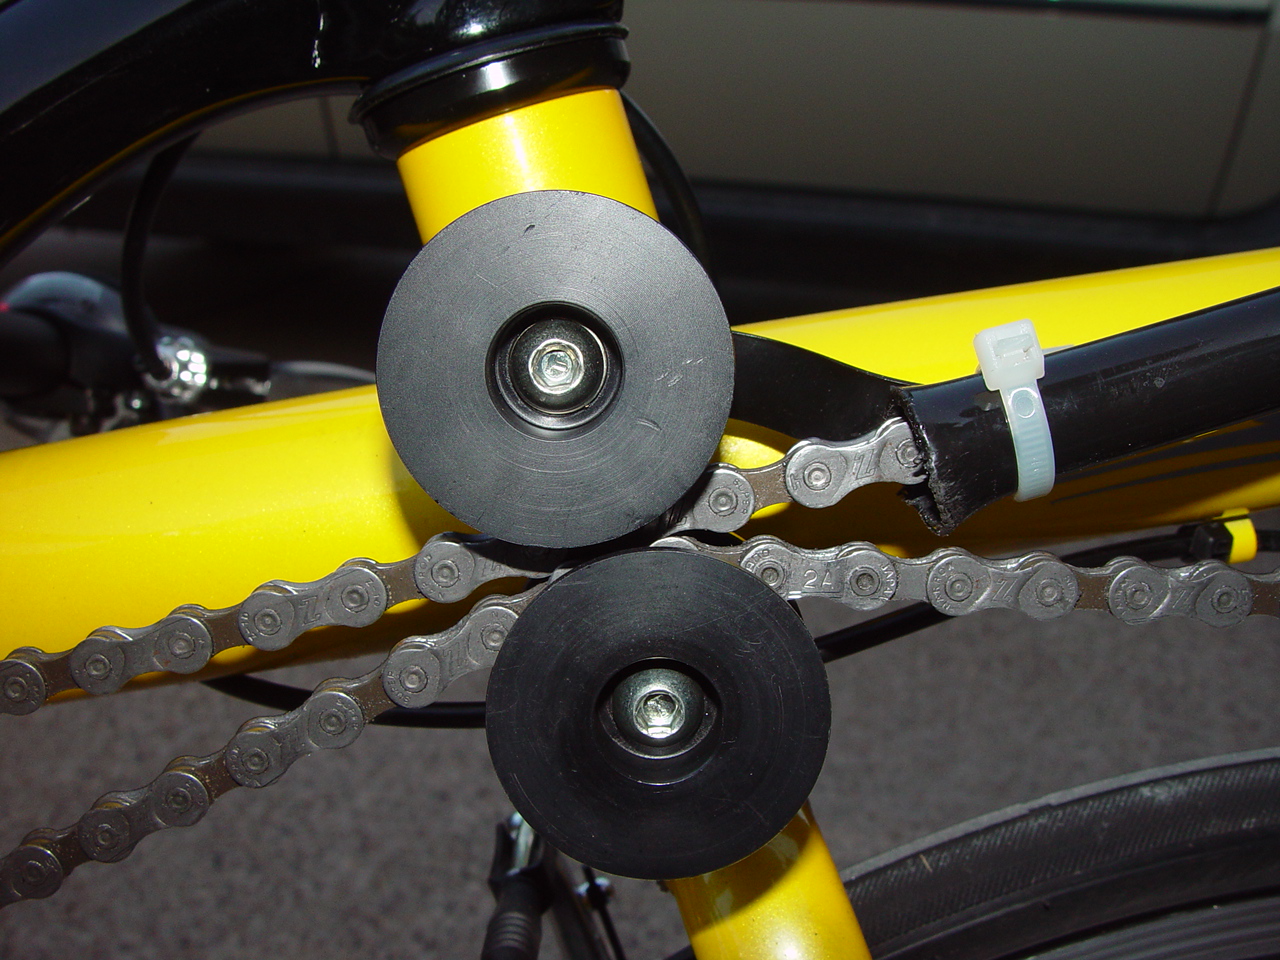
To all of these questions (if I'm on the run) I often shout out my website address, "garyolsen.com..." There are some disadvantages to owning a recumbent. You just don't jump on and ride it like a normal bike. You have to start from a stop position with both hand brakes closed and you must start slowly and purposely. I created a video clip to demonstrate the technique (see the right column). Keep the bike in a medium low gear. If you ever have to stop the bike in a high gear, you'll have to get it to a lower gear before you can start again. Oh, and unless you have legs like a linebacker, starting the bike uphill, even on a gentle slope, is nearly impossible. So I turn the bike around and point it downhill, circle around and go uphill if that's the direction I intend to go. No big deal. Your turning radius is not as tight as on a traditional bike. I really had to practice, practice, practice, to learn how to turn safely in the width of a street (about 18 feet) for example. I can do it pretty good now, but early on, I fell a couple of times. About falling and other safety issues.... Speaking of falling. I've had to lay the bike down a couple of times, but no visible damage was done except the old seat got scratched and has since been recovered. First time I hit soft ground on a bike trail and I just fell over in the grass. The second time I was going up a steep hill, and I miss shifted into a lower gear and I wasn't going fast enough and I fell over at a very low speed. Over loose gravel on an otherwise paved road I had to put my feet down and break to avoid sliding. I was amazed at the breaking ability of the bike. On a packed gravel trail a kid coming the opposite direction was so surprised to see me coming toward him on this strange bike, he drifed right into my lane. To avoid a collision I did a sliding stop putting my feet down and averted a catastrophe. if you're going slow, you're already pretty close to the ground. Because of your reclining position, I think your body is in a safer position. I'm not sure of the weight limit on the bike. I am 5'11" and weigh 204. If you are much bigger than that, it will likely change the handling characteristics of the bike I'm certain. Since you are lower to the ground you are less visible to trucks, especially SUVs. You are about half as high as most adults riding traditional bikes, and therefore less visible because you are below their window sills. Hence, the orange flag I put on my bike for riding on city streets was a good idea! How many $6 accessories can keep you from sustaining a broken neck or crushed pelvis? It makes this item more valuable than a helmet in some respects. I have special pedals (Shamano) that are combo clips. On one side of the pedal you can enage shoe clips on a Nike bike shoe that will give me full-stroke power to the pedals. The pedals can also be flipped over for casual riding with regular shoes. Here's some advice from my bike mechanic: Set the clips as loose as possible for easy exit in the event of a spill. Also, it's not advised to use the clips when you are just puttering around on city streets. They are strictly for trail and highway riding with long straight surfaces. When the bike arrived on my doorstep... When it arrived from ActionBENT in a box on my doorstep. The bike was semi-assembled. For the most part, however, all cables, brake and gear shift parts were in pieces, and I had never put a modern bike together in my life. I got out my TREK to see how everything was assembled, and used that to guide me on the recumbent. The directions that came with the bike were not helpful to me at all (sorry, ActionBent... but they need work). The pictures were fuzzy and poorly resolved. Their website was a little more helpful, but the photos were not high res enough and details were unclear. I'm sure they've improved on this aspect of their marketing and customer support. The first thing you must do before you try to install and adjust shifters is determine the length of the outrigger tube in the front that supports the front crankset and deraileur. Once you do this through measurement and some trial and error, you tight that outrigger down with the two bolts in the frame. Now you put on the chain and rear deraileur. I made the chain smaller by degrees by removing links. Ever remove or add links to a bike chain? It requires a special tool which ActionBENT includes with the bike (they include all the tools and wrenches you'll need by the way). But the chain tool was so flimsy, It quickly broke in my hands while I was reassembling the chain. I was so pissed. It was a Saturday night, and the only place I could get a new chain tool was closed on Sunday, and so my first ride would have to wait. Monday came, and I was soon in possession of a new top-of-the-line chain tool (below). I was back in business! I keep that chain tool in my prime tool kit just in case. If I ever break a chain, I can fix it right there in the road.
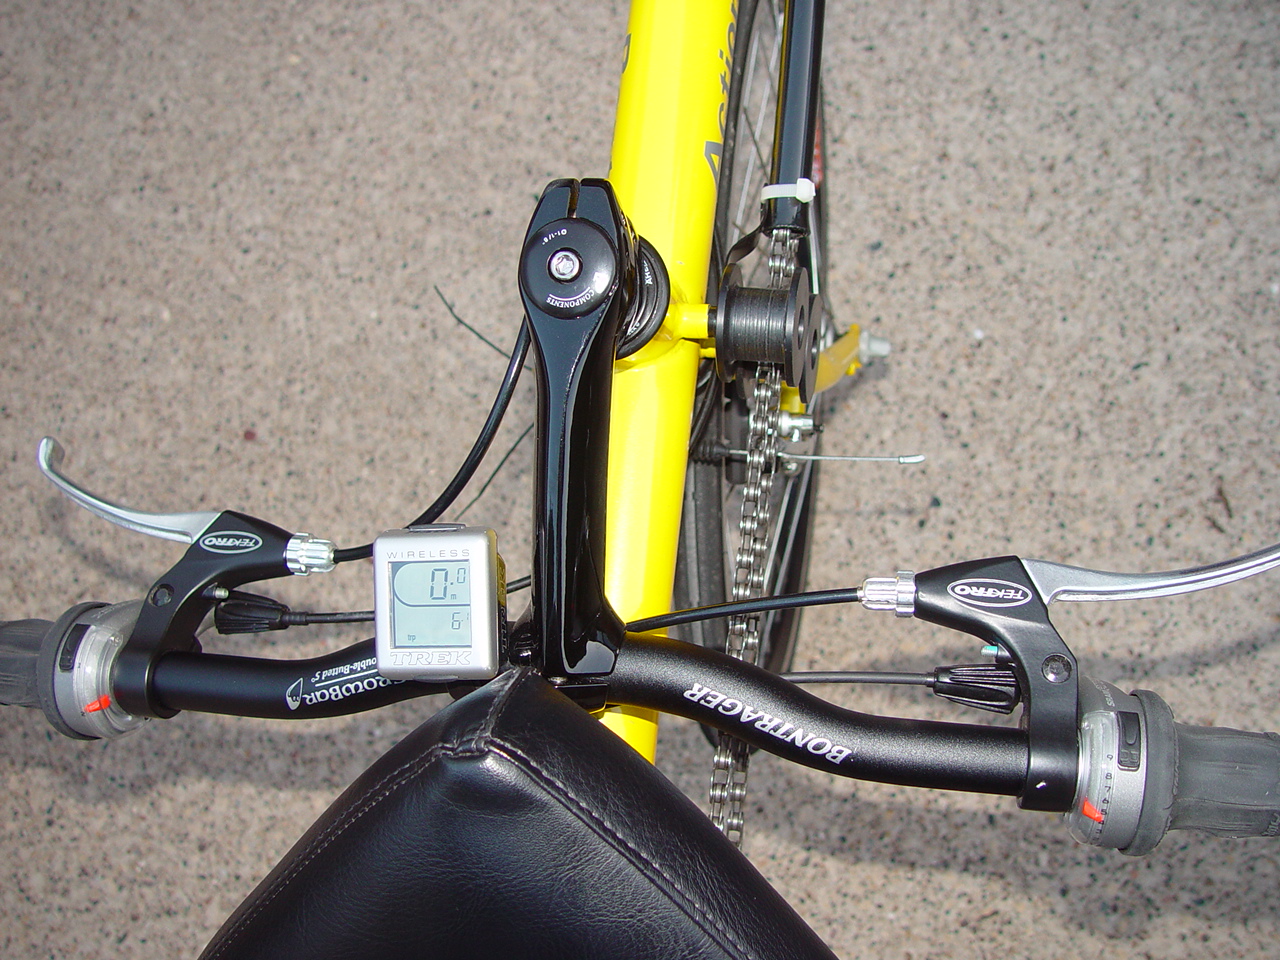
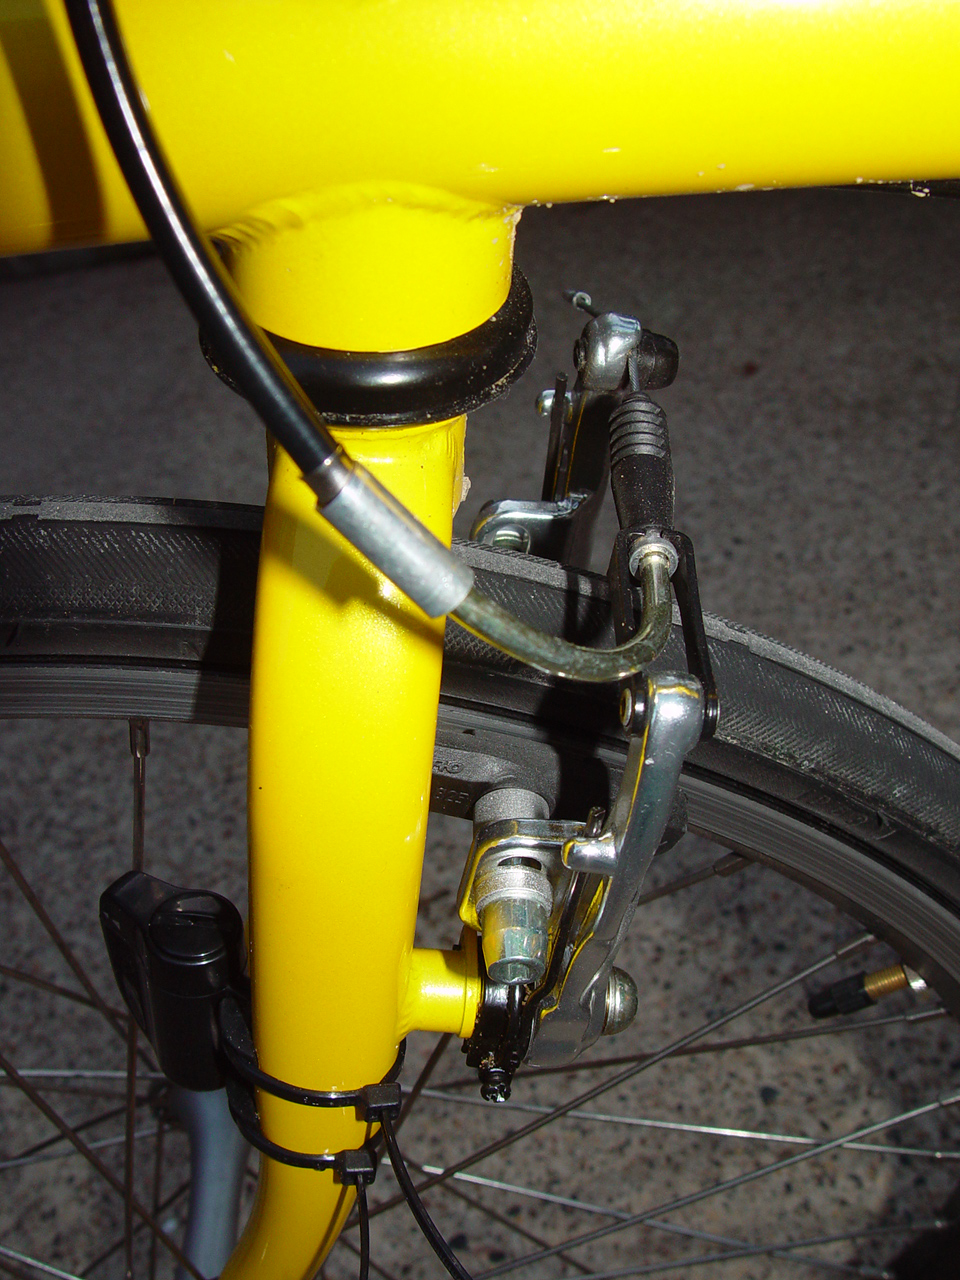
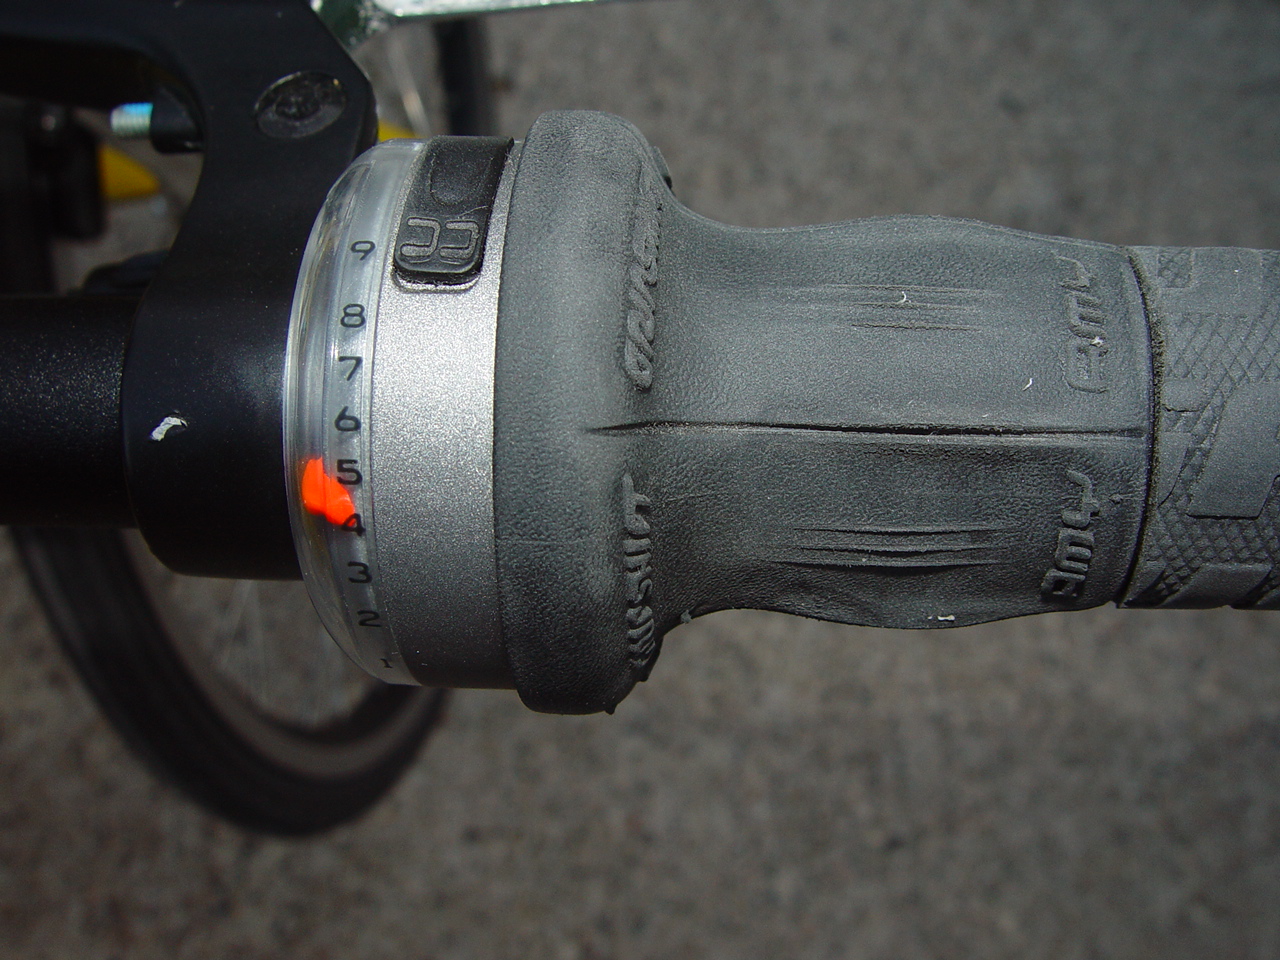
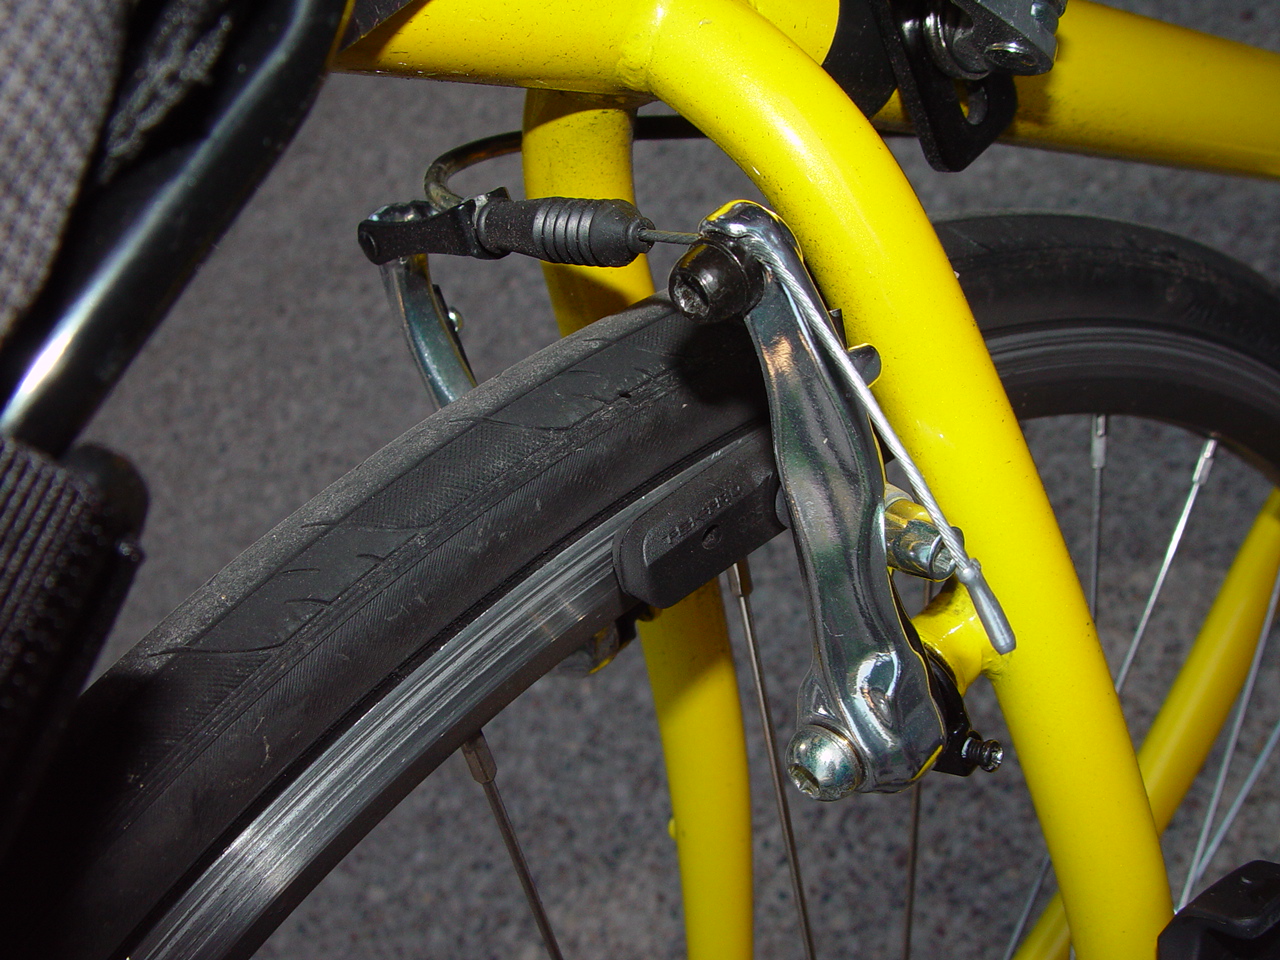
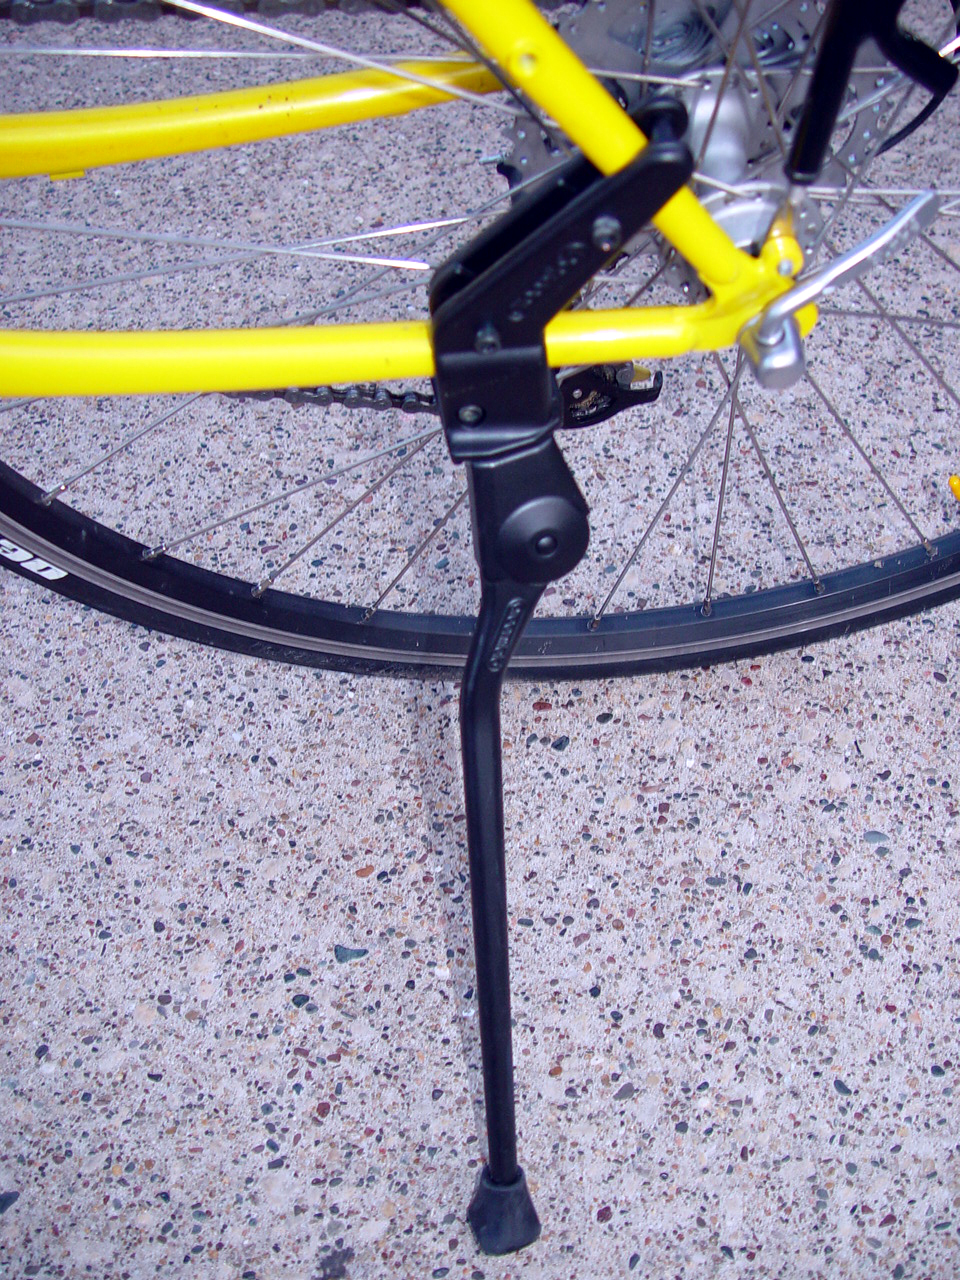
The brakes, levers, calipers, cabling were comparatively easy to assemble, thankfully. The ActionBENT came with a handlebar and gear shifters that were, in my opinion, old technology. Don't get me wrong.. The quality of all the parts were excellent, but I hated the handlebars because they impeded the steering and limited the bike's turning radius. I bought a Bontrager "Crowbar" straight style handlebar. It was a real improvement. I also tossed the gear shifters since they no longer fit in the new handlebar. Instead, I got S-RAM twist grip shifters. I LOVE them on my TREK, and they are totally awesome on my recumbent. It's so much safer to shift. The hardest part of the entire assembly process was the cables which first had to be threaded through the flexible tubing before they could be attached to the frame. That was the relatively easy part. It was trying to adjust the cable length to match the ultimate chain length that had me tearing my hair out. I finally hauled the bike over to my local bicycle mechanic, and he did all the finishing touches and adjustments. It cost me about $150 and that included some additional parts. Additional Accessories Another key accessory was a kickstand. I know it adds weight to an already heavy bike, but a kickstand saves wear and tear on the bike.
An essential accessory is a trip computer, and I purchased the Trek model that is wireless. It's a snap to install, but when I went to calibrate the device for the circumference of the front wheel (note that the front wheel is quite a bit smaller than the rear wheel) I was stumped. The instruction manual didn't have a code to punch in that was the equivalent of my front wheel. So I went to my camera bag and got out my Garmin eTREX navigation computer that calculates speed over ground using the nav satellites orbiting the globe. I set the Trek computer to a number I thought might be close to the circumference of my wheel, and took off around the block a couple of times. I compared maximum speeds and trip distances between the two devices and I dialed down the number incrementally on the Trek computer until my trip data matched perfectly. It took only three trips around the block to synchronize the computer data.
|
|
|||||||||||||||||||||||||||||||||||||
 o those of you who are unfamiliar with this configuration of bicycle,
allow me to introduce you to my customized ActionBENT Tidal Wave.
o those of you who are unfamiliar with this configuration of bicycle,
allow me to introduce you to my customized ActionBENT Tidal Wave.
 recumbent bike because I have neck
problems due to gymnastic and diving injuries I sustained year's
ago. I have limited range of motion in my neck vertebrae. Riding
a traditional road bike requires me to crane my neck to see ahead
of me, and as a result, I fatigue easily. I discovered that a recumbent
would renew my joys of bike riding and I reasoned that the reclining
position would allow my head and neck to be more comfortable. I
was right.
recumbent bike because I have neck
problems due to gymnastic and diving injuries I sustained year's
ago. I have limited range of motion in my neck vertebrae. Riding
a traditional road bike requires me to crane my neck to see ahead
of me, and as a result, I fatigue easily. I discovered that a recumbent
would renew my joys of bike riding and I reasoned that the reclining
position would allow my head and neck to be more comfortable. I
was right. 

 Finally,
I admit it... I love people staring at me when I ride by. It's like
they never saw anything like this before, and I almost always get
questions. It's a marvelous conversation starter. "Is that
bike comfortable?" "How is it on hills?" "Where
on earth did you get it (assuming I'm not from another planet like
Bizarro... you know, the Earth-like planet opposite ours in our
path around the sun? We don't know it's there because the sun blocks
its view? Everything is backwards on Bizarro? You don't read Superman
Comics? Seinfeld did an episode...?.... uhhhh, never mind...)?"
"I'll bet that was expensive." To this question I answer
"no" on Earth, but "yes" when I'm back on Bizarro.
Finally,
I admit it... I love people staring at me when I ride by. It's like
they never saw anything like this before, and I almost always get
questions. It's a marvelous conversation starter. "Is that
bike comfortable?" "How is it on hills?" "Where
on earth did you get it (assuming I'm not from another planet like
Bizarro... you know, the Earth-like planet opposite ours in our
path around the sun? We don't know it's there because the sun blocks
its view? Everything is backwards on Bizarro? You don't read Superman
Comics? Seinfeld did an episode...?.... uhhhh, never mind...)?"
"I'll bet that was expensive." To this question I answer
"no" on Earth, but "yes" when I'm back on Bizarro.